 This article originally appeared in Conspiracy News, April-May-June 2017, Heating up Edition
It’s heating up, Tucson! This means our warm-weather gardening season is upon us. As you consider which delightful crops will grace your warm-weather garden, we want to encourage you to add seed saving to your list of criteria.
A once integral part of agricultural practices across cultures, seed saving has fallen off of most gardeners’ radar in recent generations. We want to change that by helping gardeners reconnect with their inner semillista, because we believe that a community of seed savers and seed sharers is part of a healthy and robust local food system.
Many thanks to our friends at Conspiracy News for giving the Pima County Public Library Seed Library this space to share some basic seed saving tips to get you started on your seed saving adventure!
Why save seeds?
The reasons for saving seeds is as diverse as the seeds themselves. Seed saving is food security; helping to preserve the genetic biodiversity of our food crops by encouraging the planting of varieties (often heirlooms) that are not favored by commercial growers.
Seed saving is culture; helping us preserve and share the foodways & stories of the communities who have passed down the seeds. Seed saving is community; encouraging us to share its bounty. Seed saving is resiliency; helping us create seed stock that is better adapted to our unique climate.
Choose your seeds
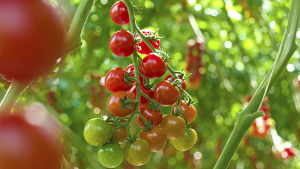
For the seed saver who is just starting out in their learning, the warm-weather garden makes a great classroom. That’s because many of the heat-loving plants we love to grow are self-pollinating, making them “easy” to save seeds from. We recommend that beginning seed savers start with self-pollinating varieties. Our favorite choice for first timers is tomatoes.
It’s important to start with open-pollinated seeds--not hybrids or F1 seeds--when planning to save seed. Open-pollinated seeds are seeds whose offspring will breed “true” as long as steps to prevent cross-pollination are taken. Whereas hybrid seeds are the crossing of two different parent plants, resulting in offspring whose seeds will have a combination of both parents’ genes. If we try to plant from those seeds, we can’t reliably know what traits will be expressed in that next generation.
Gather your tools
The indispensable tools of the seed saver are:
- Garden journal
- Masking tape
- Pollination bag (we made our own from mesh-like fabric scraps found at the fabric store, but you can also find these at Native Seeds/SEARCH or online)
- Curiosity!
Start with tomatoes
 Tomatoes are self-pollinating, but there’s always the chance that eager pollinators will squeeze into the just-barely-opening flowers, potentially cross-pollinating different tomato varieties growing in your garden. If you are only planting one variety of tomato in your garden, you don’t have to worry about this and can easily collect seeds from the ripe fruits over the course of the growing season.
But, if you’re tomato fiends like we are, we’re planting at least two varieties of tomatoes in our garden and need to take extra steps to prevent cross-pollination. If this sounds like you, follow these steps:
- Select a branch of the plant with several unopened buds (it’s recommended saving from at least 5 different tomato plants of the same variety for best genetic diversity)
- Place a pollination bag over the cluster of flowers on the branch
- Tag the section you bagged with a piece of masking tape so you know later which fruit to harvest and collect seeds from
- Allow the flowers to bloom inside the bag, keeping the bag on for a day or two past their initial bloom (help ensure good pollination by shaking the branch a few times)
- Remove the bag and allow the fruit to fully mature on the plant
Harvesting the seeds
Collect the ripened fruit from your plants (the tagged branches if you’re using the bagging method) and squeeze the pulp into a container with a little water, loosely cover and let ferment for 4-6 days, shaking occasionally. Pour off the “filmy” pulp and any floating seeds, keeping the seeds that have settled to the bottom. Rinse the settled seeds through a colander, removing any excess pulp. Spread rinsed seeds on cotton cloth and allow to completely dry (depending on humidity, up to 2 weeks)
Storage
Dry, dark, and cool: these are 3 keywords to remember when storing seeds for later use. Make sure your cleaned seeds are perfectly dry before storing. A good way to test this is by trying to cut into or snapping the seed. If you’re feeling some resistance, they’re probably still too moist and need more time to dry. Store completely dry seeds in an envelope, baggie, or jar in your cool, dark, and dry space.
Share!
We hope your seed saving journey is a fun and fruitful. Consider sharing your seedy bounty with friends, neighbors, and of course, the PCPL Seed Library!
More on seed saving
For those wanting to really dig-in to seed saving, we recommend these terrific guides which are available to check-out from the Pima County Public Library:

